Table of Contents
TogglePrecision separates a professional-looking woodworking project from one that looks cobbled together in a garage. Before you cut a single board or drill a hole, you need the right measuring tools. Woodworking measuring tools aren’t just about accuracy, they’re about confidence. When you know your measurements are dead-on, you can focus on the craft instead of second-guessing yourself. Whether you’re building a simple shelf or tackling a complex piece of furniture, having the essential measuring tools on hand will cut down on mistakes, save you material, and make the whole process faster and more enjoyable. This guide walks you through the measuring tools every DIYer should have, what each one does, and how to choose quality over gimmicks.
Key Takeaways
- Woodworking measuring tools like 25-foot tape measures, combination squares, and rulers are foundational for accurate, professional-looking projects that reduce material waste and mistakes.
- Digital calipers and depth gauges deliver pinpoint accuracy for small dimensions, fitting components precisely and eliminating guesswork in complex builds.
- A quality combo of manual and modern measuring tools—tape, squares, rulers, and optional laser measures—covers 95% of layout needs without unnecessary expense or complexity.
- Marking and layout tools such as sharp pencils, marking gauges, and story sticks prevent costly cutting errors by forcing deliberate planning before you start.
- Investing in mid-range brands, maintaining dry storage, and performing quick accuracy checks before each project extends tool life and ensures reliable measurements for years of woodworking.
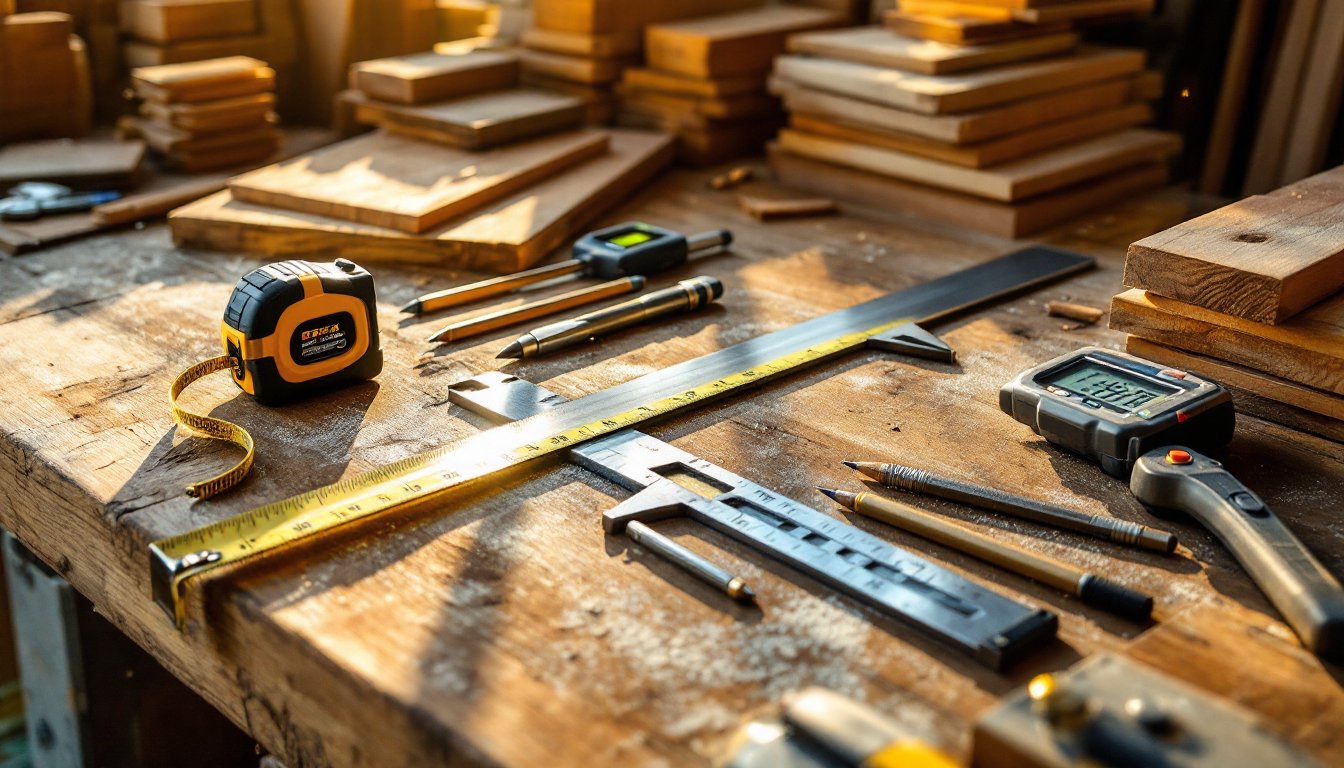
Tape Measures and Rulers: Your Foundation for Accurate Cuts
A tape measure is the workhorse of any workshop. For woodworking, a 16-foot or 25-foot tape with a 3/4-inch blade is the sweet spot, wide enough to stay rigid when extended, long enough for most projects. Look for a standout of at least 10 feet: this lets you measure across a board without a second person holding the other end.
The blade itself matters. A nylon or fiberglass coating on the back prevents the blade from curling or denting when you drop it (and you will). Check that the hook, that little notch at the end, is replaceable: it wears out with heavy use.
For precision work, a rigid ruler or straightedge fills gaps that a tape can’t. A 48-inch aluminum ruler is useful for checking flatness across boards and marking long, straight lines. Wood rulers and folding rules look vintage and work fine, but they’re less durable and can warp over time.
Budget about $20–$50 for a quality tape and $15–$30 for a straightedge. Avoid cheap retractable tapes: the blades bend easily and throw off your measurements. As part of building out your Essential Woodworking Tools, a solid tape measure is non-negotiable.
Calipers and Depth Gauges: Measuring Small Dimensions with Precision
When you need to measure diameters, thicknesses, or depths with pinpoint accuracy, calipers and depth gauges step in. Digital calipers are the most practical for woodworking. They give you readings to 0.01 inches, making them perfect for fitting drawer slides, checking mortise depths, or matching wood thicknesses before gluing.
Digital calipers come in 0–6 inch and 0–12 inch versions. For most DIYers, the 6-inch model covers everything you’ll encounter. They cost around $10–$25 and run on a watch battery that lasts years.
For depth gauges, a simple metal depth gauge or the depth probe on some calipers works well. Some circular saw and miter saw bases have built-in depth stops, but a standalone 4–6 inch depth gauge lets you match mortise or tenon depths across multiple pieces without marking each one.
The key advantage: calipers and depth gauges eliminate the guesswork when dimensions matter. If you’re building a box with sliding components or fitting shelves into dados, these tools pay for themselves in reduced errors. Practice reading them on scrap wood first, the digital display is easy, but analog calipers take a moment to learn.
These fall into the category of Measuring Tools in Workshop that ensure consistency across a whole project.
Squares and Angles: Getting Corners and Edges Right
A framing square and a combination square are your tools for catching layout errors before they become finished mistakes. The framing square, that large, L-shaped metal tool, is used to mark 90-degree angles on larger boards and to check that a corner is truly square. For smaller work, a combination square (a 12-inch metal blade with a movable head) does it all: marks 45-degree angles, checks right angles, and can measure depths when you slide the head along the blade.
Another essential: a speed square (also called a rafter square or tri-square). This triangular tool is faster to use than a framing square for marking angles and is nearly indestructible. It also doubles as a straightedge.
For curved work or checking how square your frame really is, an adjustable angle gauge (or bevel gauge) lets you copy an angle from one piece and transfer it to another without doing math. You lock the blade at the angle you need, then use it as a reference.
Accuracy check: Before using any square, test it. Lay it flat on a piece of wood with the blade aligned to one edge, trace a line, flip the square end-for-end, and trace again. If the lines overlap perfectly, it’s square. If not, discard it, a bad square ruins everything downstream.
Invest in $15–$40 for a combination square and $10–$20 for a speed square. These are the tools that keep your project from becoming a frustration.
Digital and Laser Measuring Tools: Modern Alternatives for Speed
Laser distance meters and digital levels have become affordable enough that many DIYers now use them for layout. A laser measuring device (like those from Bosch or DeWalt, $40–$150) shoots a beam across a room and gives you the distance to 1/8 inch accuracy. For large projects, shop layouts, or checking distances you can’t easily reach, this saves time and reduces errors.
Digital levels with angle readouts are also worth considering. They show you not just level and plumb, but the exact degree of tilt if something is off, useful for slopes, stairs, or tilted surfaces where precision angles matter.
The catch: these tools are fast but require batteries, and they assume a clear line of sight. For close-quarters work at the bench, measuring lumber thickness, checking dado depths, traditional manual tools are faster and more reliable. Don’t buy a laser measure thinking it replaces a tape: it complements it.
Explore projects and tool setups on sites like Instructables to see how experienced makers combine traditional and modern measuring tools in real workflows. Many prefer a hybrid approach: laser for layout, manual tools for detail work.
Marking and Layout Tools: Planning Before You Cut
Measurement is only half the battle: marking where you’ll cut is the other. A pencil sounds basic, but a sharp, fine-tipped pencil beats a fat crayon for precision. Mechanical pencils with 0.5mm leads hold a point longer. For darker, more visible marks on darker wood, a white or chalk pencil works better.
For repeating marks across multiple boards, a marking gauge (around $10–$20) is invaluable. You set a fence to your measurement, then drag the sharp point along the wood to score a consistent line. This is better than drawing with a pencil, which gets smudged or varies in width.
A story stick or layout stick is a scrap of wood where you’ve marked out the dimensions of your project full-size. Instead of measuring each component separately, you hold the stick up and mark directly from it. It’s old-school and incredibly effective, especially for furniture builds.
For layout, a layout fluid and scribe let you mark very fine lines on finished surfaces without smudging or leaving graphite dust. Helpful when you’re fitting components onto existing wood.
These items are cheap ($2–$30 total for most of them) and yet prevent more mistakes than any expensive measuring device because they force you to mark before you cut. As part of your Workshop Tools List, marking tools bridge the gap between measuring and doing.
Choosing and Maintaining Your Measuring Tools
Quality matters. Cheap measuring tools have loose blades, inaccurate graduations, and break easily. Mid-range brands (Starrett, Irwin, Dewalt, Bosch) cost a bit more but hold tolerances and last years of workshop life. Read reviews before buying: avoid tools with reviews mentioning “numbers wear off” or “blade bent.”
Storage and maintenance extend tool life. Keep tape measures and rulers in a dry place, moisture warps wood and rusts metal. Hang or store items so they don’t roll around: a loose measuring tool in a drawer gets dinged up. For digital calipers and laser measures, remove batteries if you store them over winter to prevent corrosion.
Before each project, do a quick accuracy check on your primary tools. A tape measure can shift if dropped. A square’s corner can bend. Calipers can drift. Five minutes of verification saves hours of rework.
When shopping for your first set, prioritize: a 25-foot tape, a combination square, a speed square, a ruler, and a marking gauge. That foundation covers 95% of layout needs. Add specialty tools (calipers, laser measures, depth gauges) only if your projects demand them. Quality Workshop Tools and Equipment serve you best when you use them consistently and understand their limits.
Conclusion
Precision in woodworking starts with measuring tools you trust. Investing in a solid core set, tape, squares, rulers, calipers, and marking tools, removes doubt from your projects. These tools aren’t flashy, but they’re the difference between “looks handmade” and “looks professional.” Take care of them, verify their accuracy, and they’ll serve you for decades. Your next project is only as accurate as your measurements allow it to be.